Showing posts with label dessert. Show all posts

Thursday, January 30, 2014

Simple & Pillowy Pavlova


Pavlova is incredibly simple to make but can easily turn into a catastrophe. The trick is knowing your oven and keeping the temperature consistent throughout the cooking time. I've adjusted this perfect recipe (originally from Donna Hay) to make a pavlova of optimal ratios (to serve about 5-6 people).

Pavlova
  • 3 egg whites
  • 3/4 cup sugar (superfine recommended - I use regular sugar)
  • 1 1/2 Tablespoons cornstarch
  • 1 1/2 teaspoons white vinegar
  • Few drops of vanilla extract
Topping
  • 200 ml (3/4+ cup) cream, whipped with a Tablespoon of sugar and drop of vanilla extract
  • Fruit - acidic fruits best complement the sweetness and creaminess (Here, I've used about 1-2 passionfruit, 2 kiwis, 2 peaches and a handful of strawberries)
Preheat oven to 150C / 300F.

Whisk whites until they hold soft peaks. Gradually add sugar and continue whisking (about medium speed) until stiff peaks form. You also want the sugar to be completely dissolved - check by rubbing the whites between your thumb and forefinger, if grainy, keep whisking. However, it never fully dissolves for me (using regular sugar) and that's fine.

Add cornstarch (sprinkle evenly oven mixture) and vinegar and vanilla and whisk until just combined (some prefer to fold these in).

Turn out onto Silpat or parchment lined baking sheet and shape into 7 inch circle. 

Decrease oven heat to 120C / 250F and bake for 1 hour 20 minutes. (If you have a gas oven, this will be the hardest part of making this! I usually have to carefully monitor the temperature and crack the oven door to maintain it.) You can insert a knife to be sure it's cooked. Turn oven off, leave the door open a bit and allow pavlova to cool completely in the oven (it will most definitely crack).

Top cooled pavlova with slightly sweetened whipped cream and fruit. I love using passionfruit for this, but if it's not available, I make a simple fruit sauce (raspberry or strawberry) to mix with the fruit. In Rosario, you can find passionfruit (maracuya) frozen from the verduleria on Mendoza, between Espana and Roca (100 grams is enough).

Oh, and eat it immediately, as the cream will start to break down the merengue, so don't assemble it until the last minute before serving.


Monday, March 11, 2013

La Receta Famosa de Brownie (por fin!)


Finalmente, traduje la receta que uso siempre para hacer un brownie rico. Me pregunto si es una buena idea, porque tengo la sensación que no me van a invitar a las cenas si pueden hacerlo sin mi! Pero, bueno, acá está la receta más pedida de mi cocina:

El Brownie Más Rico
  • 1 1/3 taza (170 gramos) harina (0000)
  • 1/2 cucharita (2.3 g) polvo para hornear
  • 1/4 cucharita (1.42 g) sal
  • 150 gramos manteca
  • 3/4 taza (88.5 g) cacao amargo en polvo (no de Nesquik, tiene que ser de buena calidad)
  • 2 cucharas de sopa de espresso o cafe fuerte
  • 1 2/3 taza (335 g) azúcar
  • 2 huevos
  • 2 cucharitas de esencia de vainilla
  • 3/4 taza (85 g) nueces, picados en trozos
  • 42.5 gr. chocolate semi-amargo, picado en trozos 
Enmantecar y harinar una bandeja de 20 x 30 cm. Combinar la harina, polvo para hornear y sal - dejar a un lado. En un baño maria, derretir la manteca y agregar el cacao en polvo y el café. Revolver para combinar y removerlo del calor para que enfrie un poco. En un bowl grande, batir los huevos con el azúcar y agregar la vainilla. Agregar lentamente la mezcla de manteca/cacao. Incorporar la mezcla de harina y después las nueces (guardando un puñado para poner arriba). Poner la masa (si, es un poco pesada) en la bandeja preparada, untándola con una espátula. Salpicar con las nueces y el chocolate picado. Hornear a 175º C por 25-30 minutos, o hasta que un cuchillo salga limpio.


Monday, September 17, 2012

Pasta Frola (Quince Tart)


Another Argentine recipe? Who am I? I make recipes from home ... not from this place I have lived close to 4 years ... wait. Uh-oh. It occurs to me that, perhaps, maybe, this is my home. And I've come to appreciate the foods I frequently eat. Food that everyone here already loves, so I don't have to insist on them trying my weird foreign food. I'm not sure why I'm such a hold out it took me so long but, inspired by Katie's Argentine Recipe Contest, I gave in. I love pasta frola! I eat this a lot. I want more. Okay, there. I said it.

I did want to make Vivi's recipe with mascarpone, but 2 trips to the supermercado proved useless so I went without it.


Quince Tart (Pasta Frola)
Adapted from David Lebovitz

Note that David's recipe is for a 9 or 10 inch (24 cm) tart pan, though I used a 28 cm pan. I liked the ratio it left me with, but you'll notice less crust atop the tart, plus it was a bit of work to squish and spread the bottom dough out, but it was worth it and I'll do it again. I did use extra quince 'paste' (dulce de membrillo).

  • 1 1/2 cups (190g) flour
  • 1/2 cup (70 g) polenta (cornmeal)
  • 1/2 teaspoon sea salt (I used a little less of fine table salt)
  • 2 teaspoons baking powder
  • 9 Tablespoons  (110 g) unsalted butter, room temperature
  • 1/2 cup (100 g) sugar
  • 1 large egg
  • 1 large egg yolk
  • 1/8 teaspoon almond extract
  • 2 cups (550-600g) quince paste (dulce de membrillo)
  • 2 Tablespoons port
  • 2 Tablespoons raw sugar
Whisk together flour, cornmeal, salt and baking powder - set aside. Beat together butter and sugar, mix in egg, yolk and extract. Slowly add dry ingredients, just until dough comes together. 

Measure out about 325 grams of the dough (about 3/4 of the dough). Pat it into a disk, wrap with plastic wrap and chill. Roll the remaining dough into a log 2-inches in diameter, wrap and chill.

Put quince paste into a bowl with port and mash with a potato masher. Add a splash of hot water if necessary to develop spreadable consistency.

Remove dough from refrigerator and let return to room temp slightly. With the heel of your hand, evenly press into the bottom and sides of an unbuttered removable bottom tart pan. Spread quince evenly over dough. 

Remove log of dough from refrigerator and slice into thin cookies, then lay over the jam. Sprinkle with raw sugar. Bake at 375 F (190 C) for 20-25 minutes, until golden brown. Let cool and serve at room temperature. This is even better the next day.


Make miniature Vigilantes (cheese topped with quince) with any unused membrillo!


Friday, August 24, 2012

Quinotos en Almíbar (Kumquats in Syrup)


I fell in love with quinotos last Christmas in Cordoba. Direct from the tree, they were tangy, sour and sweet in all the best ways. I picked up a kilo recently but I suppose they're out of season so they were a bit rough on the palate. So I decided to add a crapload of sugar to make them candied and syrupy.

For such a simple recipe, I found a variety of cooking techniques. All Argentine recipes required you to let the quinotos sit in salted water for 3 days or boil them with salt, then rinse. None of the recipes written in English mentioned this, but I figured that since I'm here I better not skip the step. Of course, I couldn't be bothered to wait 3 days.


I really wanted to candy them whole (because they're amazing that way) but these had too many too large seeds, so I had to halve the quinotos to remove the seeds (which was a huge pain and made me regret attempting such a sizeable batch). Note that if you do cook them whole, you'll need to poke small holes in them first.


The cooking times also varied widely between 10 minutes and 2 hours. I settled on 20 minutes, but could have removed the quinotos and continued cooking the syrup to make it thicker. Probably a good idea.

Candied Kumquats in Vanilla Syrup  
Inspired by Cooking Light

  • 750 grams kumquats, stems removed and washed
  • Big pinch rock salt
  • 3/4 cup sugar
  • 1 1/2 cups water
  • 1/2 vanilla bean (or a super small one like the only ones I can find now), scraped
  • 3 or 4 whole cloves
  • Pinch cinnamon

Boil kumquats in salted water for 8 minutes. Drain, immerse in a bowl of water and scrub lightly with your hands to remove salt. Drain again and rinse well.

Combine sugar and water in a pot and bring to a boil. Once sugar has dissolved, add kumquats, vanilla seeds, cloves and cinnamon. Drop heat to low and simmer for 20 minutes, or until tender and translucent. If thicker syrup is desired, remove the fruit but leave the syrup and continue to boil for another 10-15 minutes, or until it reaches desired consistency. Transfer quinotos and syrup to a large jar (or several small jars) and seal. If you know how to jar, you can let these sit for 2 weeks in the refrigerator to let the flavors develop. I refrigerated mine for only two days before serving.

Candied kumquats are delicious served over ice cream or pavlova (maybe make it pistachio).


Monday, July 2, 2012

Peanut Butter Chocolate Chunk Blondies


Mostly, I make brownies. But after a recent conversation about peanut butter (and having found that several of my students hadn't tried it) I thought about making a peanut butter version of blondies, and I'm glad I did. It adds just a touch of something special to dress up blondies and make them worthy competition of their all-chocolate cousins. 

Peanut Butter Chocolate Chunk Blondies
  • 1/2 cup peanut butter
  • 1/3 cup (75g) butter, softened
  • 2/3 cup white sugar (I used a bit less)
  • 1/2 cup brown sugar, packed (I did not pack it)
  • 2 eggs
  • 1/2 teaspoon vanilla extract
  • 1 cup flour
  • 1 teaspoon baking powder
  • 1/4 teaspoon salt (I used a pinch more because my peanut butter wasn't salted)
  • 1 cup (170 grams) semi-sweet chocolate chunks (I used a bit less)
The original recipe calls for a 9x9 inch baking pan, but I used an 8x12 pan and wouldn't go any smaller. 

Cream together peanut butter and butter, gradually blend in brown sugar, white sugar, eggs and vanilla; mix until fluffy. Combine flour, baking powder and salt and stir into the butter mixture until well blended (I went ahead and used the hand mixer for this since it's somewhat heavy). Fold in chocolate chunks. 

Bake at 375F/175C in a greased pan for 30-35 minutes, or until the top springs back when touched. (I actually cooked it for about 35-40 minutes, but the edges were not as gooey - still, I wanted to be sure the center was fully baked.) Cool and cut into small squares.


To comment on my changes: I used less sugar and it was still perfectly sweet enough. I added an extra pinch of salt (after tasting the batter) because the most common brand here (Sytari) is not salty like American peanut butter. And, yes, I cooked it longer than most recipes require.

I don't know why these are served in small squares, but my great-grandmother cut them the same way. I guess the idea is to make people happy but not fat. :) Portion control. Unless you eat them all. With ice cream. Whoops.

Wednesday, May 16, 2012

Faux Hostess Cupcakes


Last weekend, a friend of mine boldly went where many many men have gone before. He turned 30. I suppose it gets us all at some point. As I await my birthday, I know there's no point in hiding, but it's not easy to accept that it may be time to act like a grown-up. So, instead, let's eat cupcakes reminiscent of childhood! At a bar


Copycat Hostess Cupcakes
From Cinnamon Spice and Everything Nice
  • 1 cup flour
  • 6 Tablespoons unsweetened cocoa powder
  • 1/2 teaspoon baking soda
  • 1/4 teaspoon baking powder
  • 1/4 teaspoon salt
  • 113 grams / 8 Tablespoons butter, softened
  • 1 cup sugar
  • 2 eggs, room temperature
  • 1 egg yolk, room temperature (use the white for the cream filling)
  • 1/2 teaspoon vanilla
  • 1/2 cup boiling water
Whisk together flour, cocoa, baking soda, baking powder and salt. In a separate bowl, beat butter until smooth and creamy - about 2 minutes. On medium speed, gradually add sugar, beating until light and smooth - about 5 minutes. On low speed, beat in eggs and yolk one at a time, add vanilla. Beat in flour mixture in 4 additions, beating well after each one. Then drizzle in hot water, 2 Tablespoons at a time, until batter is smooth and shiny. Fill cupcake liners no more than half-full. For mini cupcakes,  a rounded teaspoon of batter was enough. For regular cupcakes, use 1/4 cup of batter. Bake at 350F / 180 C until a toothpick comes out clean - about 15-20 minutes. I ended up with 36 mini cupcakes and 2 big ones.


For the cream filling, I used my recipe for meringue frosting and added butter.


Cream Filling
  • 2.5 Tablespoons water
  • 1/8 teaspoon cream of tarter
  • 1/2 cup + 1 Tablespoon sugar
  • 1 large egg white at room temperature
  • 1/2 Tablespoon light corn syrup
  • 1/2 teaspoon vanilla
  • 1.5 Tablespoons butter, softened
Whisk first 5 ingredients together in a stainless steel bowl. Set the bowl in a wide, deep skillet with about an inch of simmering water. Be sure the water level is at least as high as the depth of the egg white in the bowl. Beat egg white mixture on low speed until it reaches 140F/60C. Do no stop beating while the bowl is in the skillet. Beat on high speed for exactly five minutes. Remove bowl from skillet and add vanilla, beating on high speed for two to three more minutes to cool. Beat in butter. Transfer to a pastry bag with a star tip. When cupcakes are cooled, insert tip into the middle of the cupcake, about half-way down and squeeze in cream until cupcake is heavier...stop when (or before) it begins to crack.


After filling cupcakes, spread a thin layer of chocolate ganache over the top.

Chocolate Ganache
  • 100 grams semi-sweet chocolate, chopped
  • Scant 1/4 cup heavy cream
Warm cream for about 10 seconds in microwave. Stir in chocolate and let sit 2 minutes. Stir to combine. If necessary, briefly warm in microwave. Spread a thin layer on cupcakes. Actually, I thought the ganache tasted too much like real chocolate for a copycat Hostess cupcake, so I suppose if you're going for authenticity, you should use a ganache recipe that includes butter and vanilla, too. 

Friday, April 6, 2012

Lemon Meringue Pie Cupcakes


These are my favorite cupcakes, and making them miniature leaves you with perfect proportions. The inspiration for these came from Junior MasterChef Australia - a show based on mini chefs (ages 8-12) that had me so hooked I watched an episode or two every day until I'd finished both seasons. I can't explain why I love it so much, except that they're all so nice and wonderful to each other. They give encouragement and hugs...awww...something you never see from professional chef competitions. Anyway, I thought it was darling and I learned a few things too. Like how to make lemon meringue pie cupcakes. Thank you, Isabella.


Lemon Cupcakes (makes about 15-16 miniature cupcakes)
from Bella Lately
  • 1/2 cup + 2 heaping Tablespoons (equivalent of 1/8 cup) flour
  • 1/2 teaspoon baking powder
  • 1/2 teaspoon finely grated lemon zest
  • 1/8 teaspoon salt
  • 1 stick (113 grams) unsalted butter, softened
  • 1/4 cup + 1 heaping Tablespoon sugar
  • 1 large egg
  • Few drops of lemon extract - optional
Whisk together flour, baking powder, lemon zest and salt in a bowl. Beat butter and sugar in a separate bowl with an electric mixer at medium speed until pale and fluffy, 2-3 minutes. Beat in egg and extract until just combined. Spoon into cupcake liners but do not overfill. Bake at 375F/190C for 20-25 minutes - test with a toothpick. Remove from oven and let cool.

This batter is quite butter-heavy, so experiment with your favorite lemon cupcake recipes. This one is actually from a lemon poppyseed cake that is divine.


Once cooled, use a knife to cut a small cone out of the top of the muffin (about half way down the cupcake) to make room for the curd.

Lemon Curd
adapted from Smitten Kitchen
  • 4 egg yolks
  • 2/3 cup sugar
  • 1 Tablespoon (14 grams) butter, cut into pieces
  • 1 1/2 lemons (smaller sized or one big one), grated and juiced
Combine all ingredients in a double boiler over boiling water. Cook and stir until mixture begins to gel or thicken ever so slightly (about 10 minutes). Remove from heat and immediately press through a strainer. Allow to cool. Chill in the refrigerator to thicken. Keeps for one week in the fridge. Can be frozen. This recipe makes enough for 2 batches of mini cupcakes ~30.

Once chilled, pipe it to fill the holes in the cupcakes. 


Meringue Frosting
half-recipe from Smitten Kitchen
  • 2.5 Tablespoons water
  • 1/8 teaspoon cream of tarter
  • 1/2 cup + 1 Tablespoon sugar
  • 1 large egg white at room temperature
  • 1/2 Tablespoon light corn syrup
  • 1/2 teaspoon vanilla
Whisk first 5 ingredients together in a stainless steel bowl. Set the bowl in a wide, deep skillet with about an inch of simmering water. Be sure the water level is at least as high as the depth of the egg whites in the bowl. Beat egg white mixture on low speak until it reaches 140F/60C. Do no stop beating while the bowl is in the skillet. Beat on high speed for exactly five minutes. Remove bowl from skillet and add vanilla, beating on high speed for two to three more minutes to cool. Use frosting the day it is made.

Pipe the frosting on top of the filled cupcakes. You can use a kitchen torch to brown it a bit if you like. I'm not as fancy as some 12-year-old cooking prodigies. 

Friday, September 30, 2011

Sweet Noodle Kugel with Membrillo Jam


Whenever I describe my husband's Jewishness (or lack thereof) I say that he's Jewish, but the wrong half. This is incorrect, of course, because you're either in or you're out - based on your mother. My mother-in-law is not Jewish (well, actually, she is in the same 'wrong-half' way, as her father was Jewish) but my father-in-law is. This means that there is a long history of Jewish culture in the family, but no Jewish mothers with sacred recipes. Too bad, but at least Smitten Kitchen features an array of Jewish food. Celebrating the New Year with my great-uncle-in-law inspired me to figure something out so I cooked up a proper feast for Rosh Hashanah, I think.

There was challah, zucchini latkes, two kugels and an apple cake (and a chicken - not of my doing). Having no real experiences to go off of, I'd say it featured some traditional dishes but I have no idea how they compare amongst many other versions. It was mostly Smitten Kitchen recipes, since I trust her and I don't think she's trying to trick me. ahem.

So here's the most interesting part of it all - sweet noodle kugel (which my autocorrect seems to want to change to bugle). Really, I think this is a brunch food. It's super sweet and soufflé-like but it has freaking noodles in it. Still, it's almost like eating cake. I can't explain it, as it confuses me, but I keep eating it just to see if I can figure it out. I can't, but that's alright.

I replaced the cottage cheese with ricotta (based on availability) and I subbed-in some casan crem (sour cream). My recipe is also for half a batch - which was plenty because everyone else at dinner was just as confused as I was and ate small pieces of this sweet casserole. I added membrillo because our uncle remembered long ago eating a kugel his mother would make with layers of membrillo. I had no idea how to do that, so I swirled in some jam.


Sweet Noodle Kugel with Membrillo Jam
adapted from Smitten Kitchen
  • 225 grams (1/2 pound) wide egg noodles
  • 4 eggs
  • 3/4 cup sugar (I would probably reduce this by a Tablespoon or 2)
  • 300 grams ricotta cheese
  • 150 grams sour cream
  • 85 grams (or 1 stick) butter, melted
  • 1 teaspoon vanilla
  • dash of salt
  • 1/4 cup membrillo jam
Cook the noodles al dente, drain. In a large bowl, beat eggs until fluffy. Gradually add sugar, then the ricotta cheese, sour cream, butter, vanilla and salt. Stir in the drained noodles. Drop blobs of jam into the mixture and swirl with a knife. Pour into a greased 9x9 pan and bake at 350F/180C until kugel is set - mine took about 50 minutes but my oven runs hot.


Thursday, August 18, 2011

Sprinkle Doughnut Cupcakes


I found this recipe for gorgeous glazed doughnut muffins on MyBakingAddiction and just couldn't leave well enough alone. Not only did I dip them in the glaze, I also dunked them in sprinkles. It was my birthday week. The batter seemed more cakey than muffin-like so I'm calling them cupcakes. I was expecting something more dense, like a cake doughnut, but was pleasantly surprised by their lightness. Of course, the flavor is closer to a cake doughnut than a yeast doughnut and it's slightly reminiscent of spice cake. It would make a delicious take on a cider doughnut if you added cider to the batter and/or the glaze. Although, I think the best combination would be with a maple glaze and a glass of cider. aww, now I miss apple cider. a lot.

Anyway, have you noticed that cupcake shops are springing up all over town? Well, maybe not cupcake-only shops but definitely bakeries with a strong focus on cupcakes. But what the hell are they putting on top?! Is that merengue? Damn it. Whip up a freakin' buttercream for crying out loud.

Doughnut Cupcakes
  • 1/4 cup / 57 grams butter
  • 1/4 cup vegetable oil
  • 1/2 cup sugar
  • 1/3 cup brown sugar
  • 2 large eggs
  • 1 1/2 teaspoons baking powder
  • 1/4 teaspoon baking soda
  • 3/4 teaspoon nutmeg 
  • 1 teaspoon cinnamon
  • 3/4 teaspoon salt
  • 1 teaspoon vanilla extract
  • 2 2/3 cups flour
  • 1 cup milk
Cream together butter, oil and sugars until smooth. Add the eggs, beating to combine. Stir in baking powder, baking soda, spices, salt and vanilla. Stir flour into the butter mixture alternately with the milk, beginning and ending with the flour and making sure everything is thoroughly combined. Spoon batter into 12 cupcake liners (sprayed with oil to ensure they don't stick) filling the cups nearly full. Bake at 220C/425F for 15 to 17 minutes or until they're a pale brown a cake tester comes out clean.

Glaze:
  • 3 Tablespoons butter, melted
  • 1 cup powdered sugar, sifted
  • 3/4 teaspoon vanilla extract (or maple, if that's something that exists in your country)
  • 2 Tablespoons hot water
Whisk together all ingredients until smooth. 

Plus, don't forget that you need a crapload of sprinkles. Like, more than 100 grams.

When cupcakes have cooled slightly, dip the crown into the glaze and allow glaze to harden. Cool on a rack with something underneath to catch the glaze drippings. (ps - these will make a mess on your liners) Let chill in the refrigerator before the applying second coat of glaze. I brushed on a thin second coat because I didn't want it to be too runny or thick, as the sprinkles would quickly ooze off. Immediately dunk the cupcake into a bowl of sprinkles and allow to set in the freezer for 5-10 minutes. (seriously, they will end up in a multi-color puddle otherwise)


Don't forget to share these with Twink and Starlite and all the slaves your friends in Rainbow Land!


Wednesday, May 25, 2011

Pastelitos!


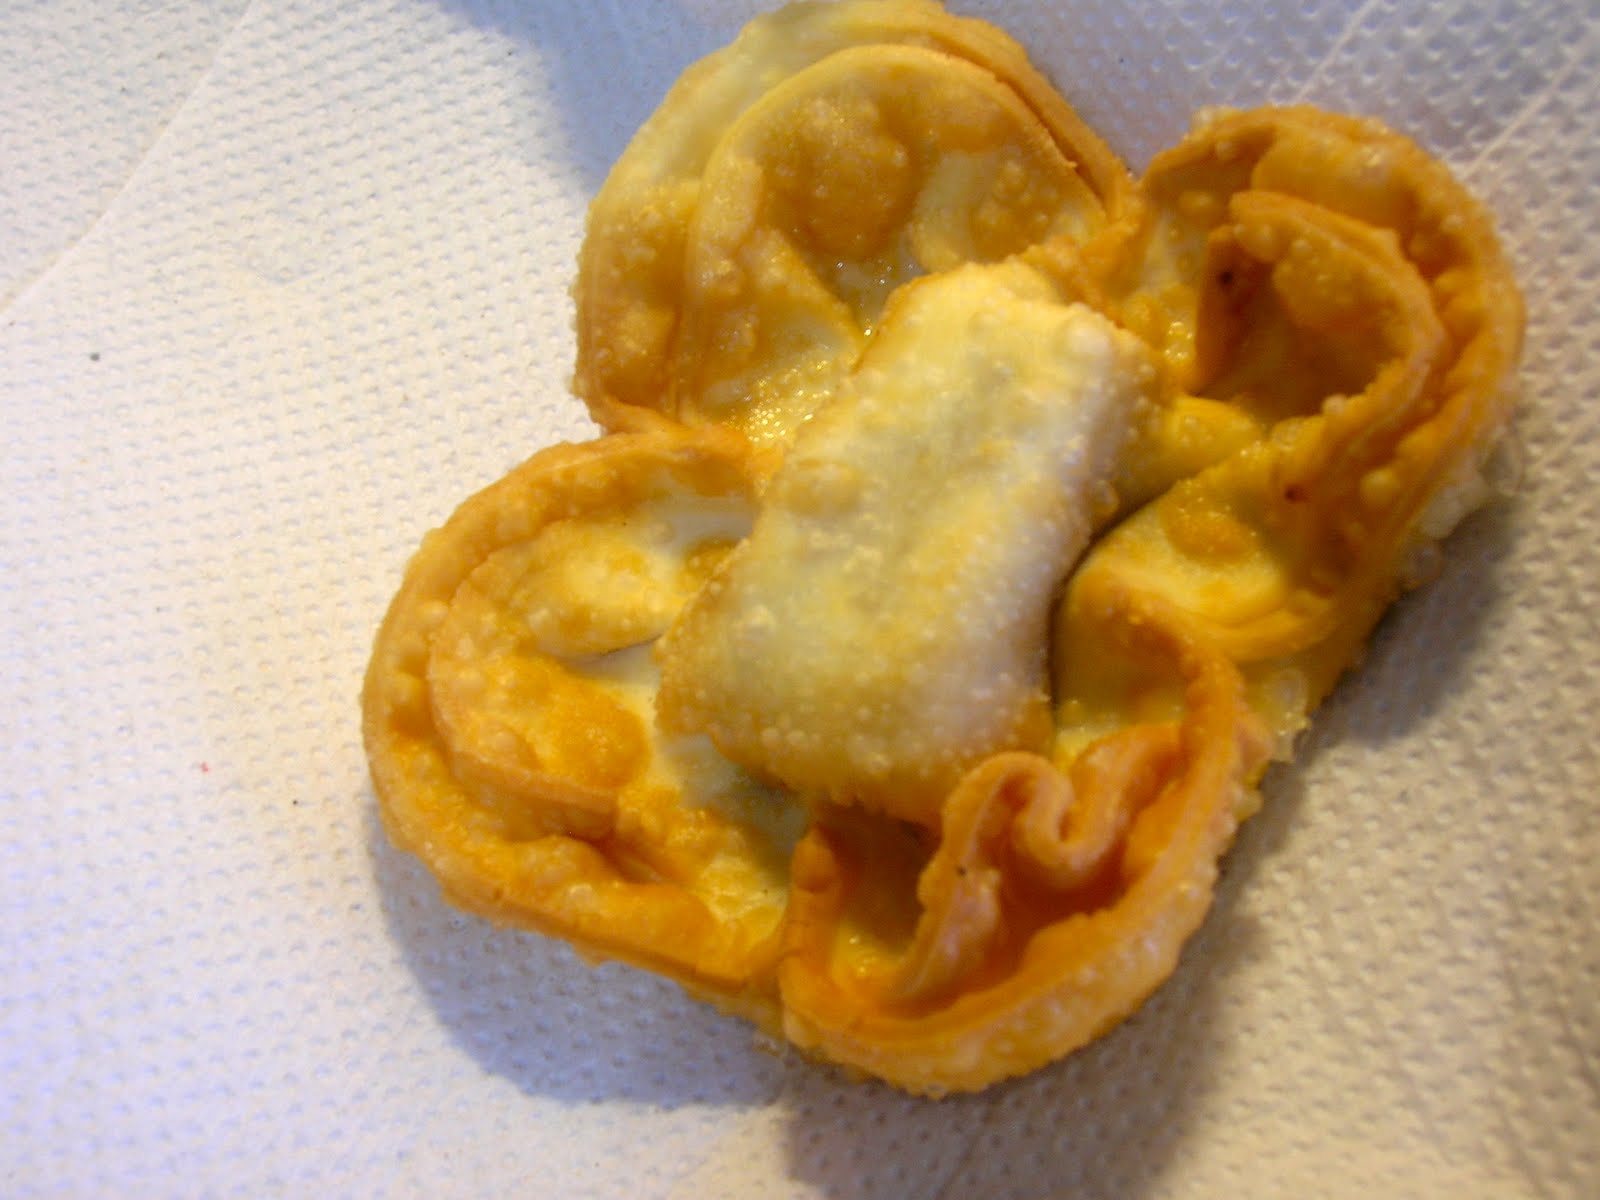
In celebration of 25 de Mayo this year, we fried dessert. Sure, last year it was soup. This year it was serious. Last weekend at my father in law's birthday party we ate the most delicious pastelitos, aka warm, fried dough sprinkled with sugar and oozing with something sweet. Here's a photo of them in all their fried glory by Diego Llarrull.

Photo by Diego Llarrull
A post on From Argentina With Love convinced me that these are quite simple to make...just in time for 25 de Mayo! Instead of a recipe, I'm just going to say that we used pre-made empanada dough rounds (Yuli), some filling, and some sugar, along with oil for frying and almibar. To be more specific, we placed a square of filling - either dulce de membrillo, chocolate, or a spoonful of dulce de leche - in the center of one dough round, wet the area around the filling and then topped with another dough round, sealing the dough around the filling. 


To make this lovely flower shape, place your forefingers under the dough on opposite sides of the circle, pull up slightly and pinch the dough together using your middle finger and thumb. Repeat on the other side of the circle. We didn't moisten and and seal the edges so that we could have more fried dough surface area. However, it is advisable to do so if you use dulce de leche as a filling.

Dulce de membrillo is a traditional filling for pastelitos.


Chocolate is not.

This is not a science project, it's a jar of homemade (by the afore mentioned father in law - he's a real Renaissance man!) dulce de membrillo. The syrup (which results from boiling membrillo with sugar) is called almibar - we'll use this later.


So we take our little dough creations...whoops, some membrillo is poking out. But, no worries.


And we fry them in some hot oil (over medium heat) - this is sunflower oil.


They take about 1-2 minutes each to turn golden, and then should be removed to a paper towel where they will be immediately drizzled with a spoonful of almibar or sprinkled with sugar, or both!


Not long afterwards (because they should be eaten warm) they will be taken to the table to be consumed immediately with patriotic gusto.


Oooh, melty chocolate. (I'm warning you, this is not a traditional filling and may cause funny looks from locals)


Ooozing dulce de leche (also not traditional for pastelitos, watch yourselves)


Here's a familiar taste. Happy 25 de Mayo, Argentina. Sorry if I have displayed unpatriotic behavior by changing up the fillings, but they're delicious. 

Monday, May 16, 2011

Favorite Chocolate Cupcakes and Dulce de Leche Frosting


I've been baking mucho lately. I should probably work more and bake less, but that is no fun. I've found two excellent chocolate cupcake recipes. One is Smitten Kitchen's flourless Chocolate Soufflé Cupcakes. These are so rich that they don't need frosting but they do need something to fill the little sunken center on top, so I plopped in a scoop of ice cream. The second is a well-traveled Cooks Illustrated recipe for Ultimate Chocolate Cupcakes, which I found the following half-recipe for on Cookie Madness. This is now my go-to recipe for chocolate cupcakes. I guess that's why they're the ultimate.

My Favorite Chocolate Cupcakes
Ganache Filling:
  • 1 oz / 28 grams bittersweet chocolate
  • 2 Tablespoons heavy cream
  • 1/2 Tablespoon powdered sugar
Put all ingredients into a microwave safe bowl. Heat 10-30 seconds, until mixture is warm. Whisk until smooth. Refrigerate until just chilled, no more than 30 minutes.

Cupcakes:
  • 1 1/2 oz / 42 grams bittersweet chocolate
  • 2 1/2 Tablespoons / 15 grams cocoa powder
  • 1/4 cup plus 2 Tablespoons hot coffee
  • 1/4 cup plus 2 Tablespoons / 58 grams bread flour
  • 1/4 cup plus 2 Tablespoons / 72 grams sugar
  • 1/4 teaspoon salt
  • 1/4 teaspoon baking soda
  • 3 Tablespoons vegetable oil
  • 1 large egg, room temp
  • 1 teaspoon vinegar
  • 1/2 teaspoon vanilla extract
Combine chocolate, cocoa, and hot coffee in a mixing bowl. Whisk until smooth and refrigerate for 15 minutes. In a separate bowl, mix flour, sugar, salt, and baking soda. Whisk oil, eggs, vinegar, and vanilla into the cooled chocolate mixture until smooth, then stir in flour mixture. Divide batter between 6 baking cups and place 1 rounded spoon of ganache on top of each cupcake. Bake at 350F/180C for 17-19 minutes, until just firm to the touch. 

The Ultimate recipe includes a creamy chocolate frosting recipe that I didn't make because I'm afraid of eating raw eggs. Instead, I topped with dulce de leche cream cheese frosting. Though, I would also suggest a cream-based mocha frosting or a perhaps even a marshmallow frosting, if you're into that sort of thing.


Dulce de Leche Frosting
  • 56 grams / 1/2 stick of butter, softened
  • 113 grams / 4 ounces cream cheese, softened
  • 3 ounces (this is half of 3/4 cup) dulce de leche
  • 1/8 teaspoon salt
  • 1 1/2 - 2 cups powdered sugar
Beat cream cheese on medium speed for about 30 seconds, until very soft. Scrape down sides of bowl and add butter and dulce de leche. Beat on medium until well incorporated. Add the salt and powdered sugar. Beat on medium for about 3 minutes, until fluffy and lighter in color. I noticed that it wasn't quite thick enough for frosting so I continued to add powdered sugar until I got the right consistency. This makes enough for about 12 cupcakes. The frosting also went well with vanilla cupcakes with chocolate ganache centers.

Friday, April 29, 2011

Peanut Butter Cupcakes with Nutella Frosting


According to a jar of amazingly delicious peanut butter that we were gifted by a friend who had just returned from Cordoba (the province right next to ours), Hernando, Cordoba is the nation's peanut capital. If you ever see a jar of "La Campiña" you should grab it, and a spoon, and go. to. town.


This jar of peanuty goodness inspired me to bake peanut butter cupcakes. And a jar of Nutella inspired the frosting for such. Sometimes, brilliance awaits you in your cupboard. The peanut flavor of the cupcakes is perfect, almost (not quite but almost) overwhelming the Nutella. And they're a bit more dense than a light and fluffy cake. I busted out a spoon to finish one off. I would suggest making these as mini cupcakes - thus having a more equal ratio of peanut to Nutella flavor. Or, making them as smaller cupcakes - I filled about 1/2 - 2/3 full, so this could be reduced.


Another way to boost Nutella flavor, while cutting into the density of the cake, would be to scoop out a bit of the middle and fill with Nutella. Or double the amount of frosting that I made. Whatever your poison. Or cupcake pan size.

Peanut Butter Cupcakes
from Liv Life
  • 1 1/4 cup flour
  • 1 1/4 teaspoon baking powder
  • 1/4 teaspoon salt
  • 2/3 cup packed brown sugar 
  • 1/4 cup peanut butter
  • 42 grams / 3 tablespoons butter
  • 1 teaspoon vanilla
  • 1 large egg
  • 1 large egg white
  • 1/4 cup milk
Whisk together flour, baking powder, and salt - set aside. Beat brown sugar*, peanut butter, butter, and vanilla until blended (4-5 minutes). Add the egg and egg white, beat until combined. Add the flour mixture in a few additions, alternating with the milk - beginning and ending with the flour. Mix until combined. 

Spoon batter into 10-12 muffin cups (I would say to aim for 12). Bake at 180C/350F for 20 minutes or until a tester comes out clean. 

*I used part (about 1/4 c.) white sugar, as I'm quite stingy with my smuggled-in brown sugar


Nutella Frosting
from Good Life eats (I made half of the recipe, as follows)
  • 85 grams / 3 ounces cream cheese (Finlandia), at room temperature
  • 14 grams / 1 tablespoon butter, at room temperature
  • 1/4 cup Nutella
  • 1 3/4 - 2 cups powdered sugar
  • 1 teaspoon vanilla
Cream butter and cream cheese. Add Nutella and vanilla and continue to cream. Slowly incorporate powdered sugar, scraping down the sides of the bowl as necessary. Beat on high until fluffy and smooth.


Monday, July 5, 2010

Gooey S'mores Brownies


Yes, I've been reading Joy the Baker's blog again. Back at it with the brownie thing. This time, I wanted to use up the rest of the s'mores supplies that my family brought down from the US. I haven't seen marshmallows or graham crackers anywhere in Argentina so you may have to do some importing for this recipe. After reading through the comments for S'mores Brownies, I decided to go with a more fudgy batter, but I thought the mallow placement and incorporation of graham crackers was genius. So I combined these elements with this batter. I really wanted them to be reminiscent of s'mores, so I used pieces of Hershey's chocolate for an authentic flavor. I also wanted a more gooey marshmallow so I didn't add them until 15 minutes into cooking time.


I'm so in love with these brownies. They're very similar to the taste of a s'more combined with everything you love about brownies. These are my favorite.

Gooey S'mores Brownies
  • 1 1/3 c. flour (plus another 2 T. if using Argentine flour)
  • 1/2 t. baking powder
  • 1/4 t. salt
  • 150 g. butter
  • 3/4 c. cocoa powder
  • 2 T. strong coffee
  • 1 2/3 c. sugar
  • 2 eggs
  • 2 t. vanilla extract
  • 1 c. graham cracker, broken into pieces
  • 1 Hershey's chocolate bar, broken into small pieces
  • 12 marshmallows
Butter and flour a baking dish - the baking time for this recipe is based on using an 8x12 glass pan - if you use 9x13, you will want to decrease baking time by possibly 10 minutes. (Note that Joy's recipe is for 18-25 minutes.) Preheat oven to 350.

Combine flour, baking powder and salt - set aside. Combine butter and cocoa powder in a double boiler, add coffee and stir to melt ingredients - set aside to cool slightly. Whisk together eggs and sugar, add vanilla. Slowly add chocolate mixture to sugar mixture. Add flour mixture and stir to combine. Fold in the graham crackers.

Pour batter into prepared pan and top with chocolate pieces. Bake for 15 minutes, remove from oven and quickly place the marshmallows on top of the batter (don't worry if it seems not to stick - don't push them in too hard). Put brownies back in the oven for another 15-20 minutes. (Adjust time if using a larger or metal pan).

Allow to cool for 20 minutes, cut into 12 squares, then I recommend eating immediately while still warm.